
I had written a tutorial long ago about how to remove noise (hiss) from recordings using Audacity. Audacity has grown since then and my last tute may be confusing to those who are using the latest version of Audacity, so here's a tute on using the new software.
First, open your recording in Audacity. There are two ways to do this, no matter which version of Windows you are using:


First, open your recording in Audacity. There are two ways to do this, no matter which version of Windows you are using:
- Open Audacity. Go to File--> Open. Navigate to the folder where you've stored the audio file and double-click the filename.
- Use Windows explorer to navigate to the folder where you've stored the file. Right-click the filename, select "Open with" and select Audacity from the droplist that pops up.
The second method, though faster, may not work if you haven't opened an audio file in Audacity before. If you don't see Audacity in the droplist, simply abort the operation and try the first method given above.
Once you open the file in Audacity, it'll look something like this:

Those squiggly lines you see are the parts of the track that contain sound. In this particular track, noise was heard mainly when the person was speaking. Fortunately, there was a small section that had noise without the person's voice. Look for such sections of the track and click-drag to select one such section (all noise, no voice):
Your screen should look something like this:

Next, click Effects--> Noise Reduction:

The following screen will appear:
Click "Get Noise Profile".
You will be taken back to the track with your selected part highlighted, like so:

Hit Ctrl+A (holding down Ctrl, hit A on the keyboard) to select the entire track. Now your screen should look something like this:

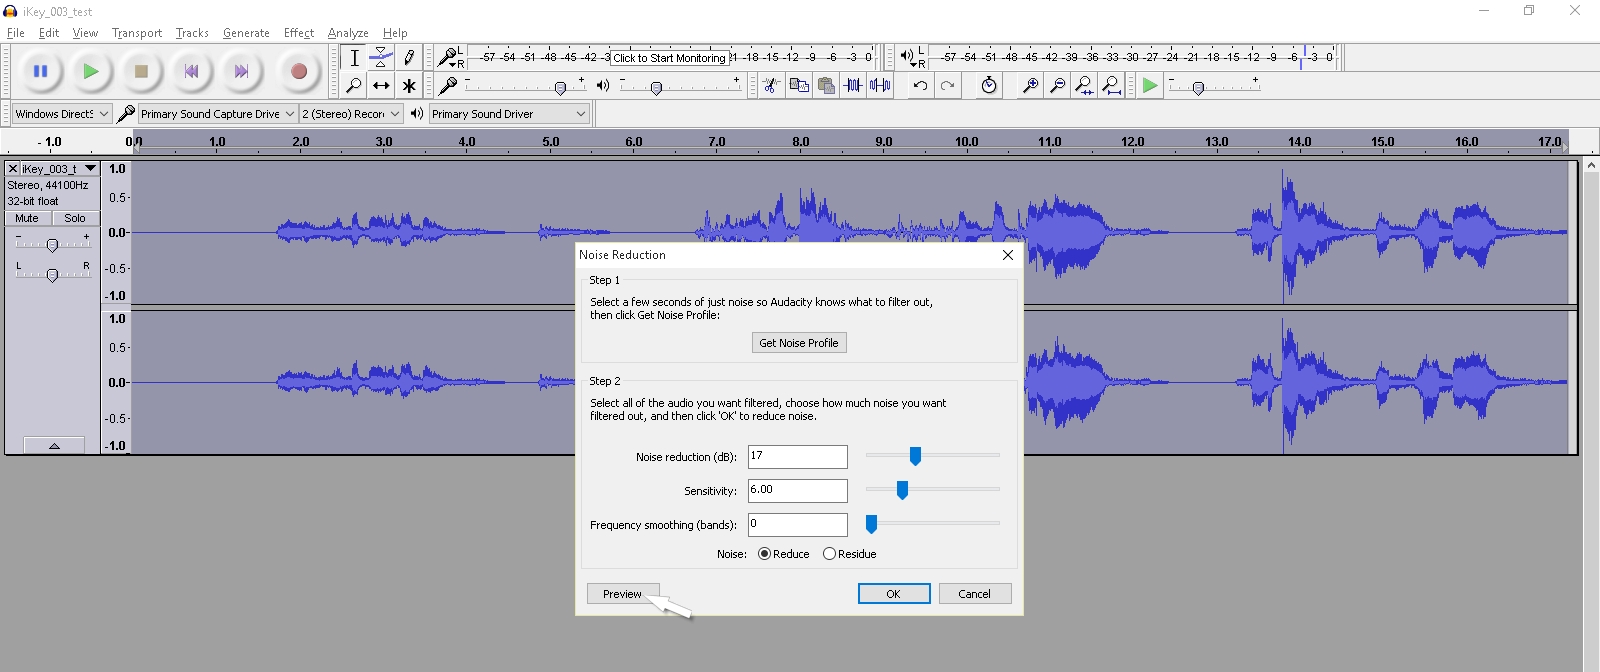
Now go to Effects--> Noise Removal again:

You will be presented with the Noise Removal dialog again. This time, click "Preview":

If you are happy with the noise removal, OK your way out and export your cleaned file. If there is still a buzz, move the sliders a wee bit to the right and listen to the preview again. If you find that there is distortion of the audio track, move the sliders a wee bit to the left. Keep experimenting until you find the right balance and then OK your way out and export to wav or mp3.
Some recordings may be really too terrible to be completely cleaned. In such cases, work to a best solution.
All the best,
Deepak